
Hello. In this simple tutorial we will learn how to install and run Teamviewer. Teamviewer allows us to troubleshoot your machine remotely.
1. Open your browser (Safari, Chrome, Firefox, etc) and click on the following link https://download.teamviewer.com/download/TeamViewer.dmg
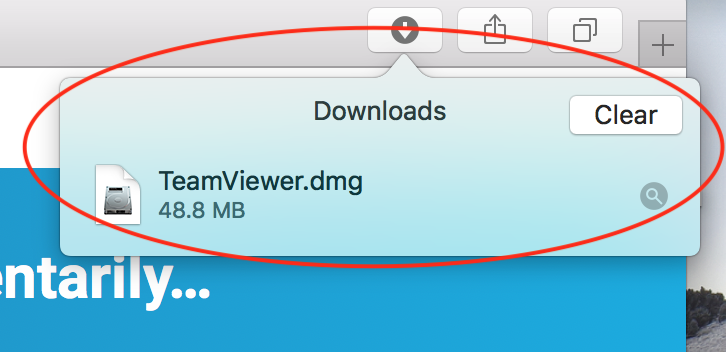
2. Wait for a few seconds, your download will automatically start. You can check the status of your download by clicking on the arrow button on your top right corner.
3. Double click on TeamViewer.dmg as shown above and wait a few seconds for macOS to verify the download.
4. Double click on Install Teamviewer

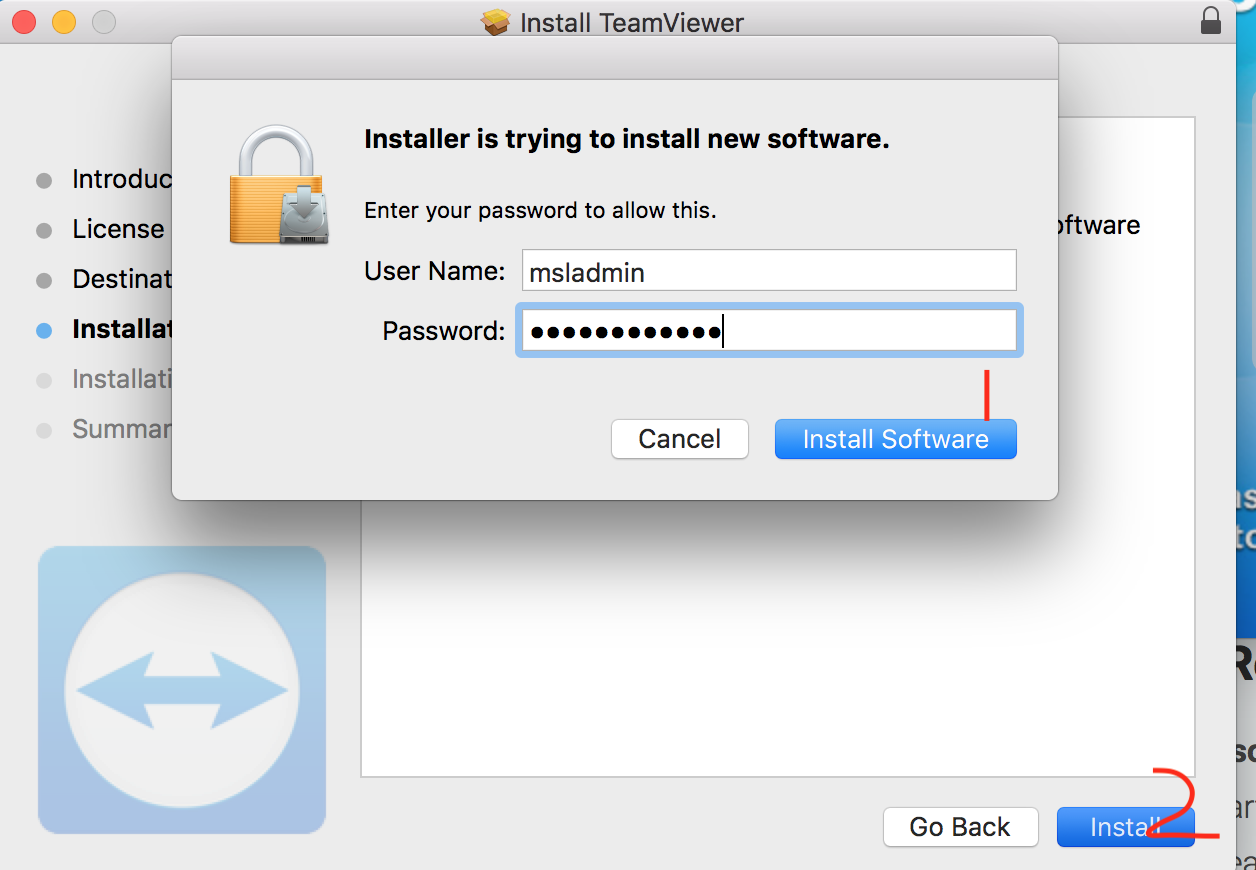
5. At the next screen, click on continue. After the terms and conditions, you will be prompted to enter your password. (You will need admin rights on your Mac to install this program)
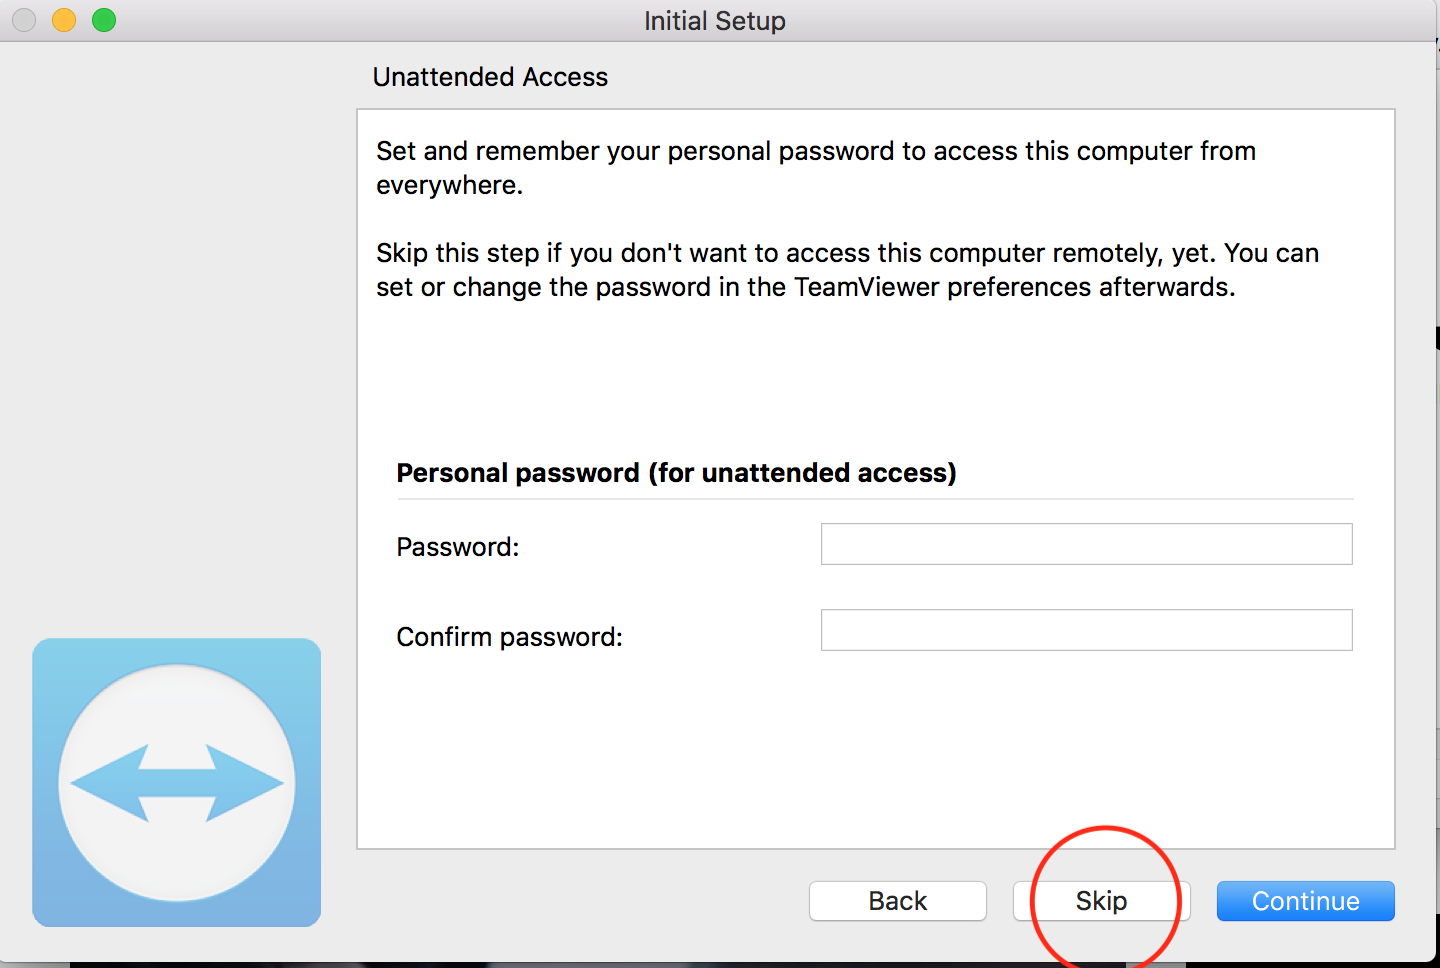
6. At the next screen, you will be prompted to create a password for unattended access. This is not advisable as we recommend a randomly generated password for every session. Click on Skip.
7. You will now be presented with a 9 or 10 digit ID and a passcode. You will need to give this details to our engineer to establish a remote session.

How to grant access to TeamViewer on your Mac if you are using macOS Mojave or Higher

To allow the access, click the buttons shown in the dialog. Eg. click to allow Accessibility, click on Request Access... - then confirm by clicking on Open System Preferences
which will bring you to the Accessibility section of the Privacy panel, inside the Security & Privacy preferences:


For the Accessibility access, you will need to click the padlock icon in the lower-left corner to make changes. You might be prompted to enter the credentials of an administrator account to continue.
Put a check next to TeamViewer to grant it access:


0 Comments